Editor’s Note: The Asphalt Roofing Manufacturers Association (ARMA) has prepared many technical reports to aid roofers in the proper installation of various asphalt roofing systems. ARMA [https://www.asphaltroofing.org/] has granted permission to publish this report for the benefit of roofers.
Snow and ice accumulation on steep-slope roofs can lead to ice dams at the roof eaves. Ice dams are typically formed by the repeated thawing and freezing of melting snow or backing up of frozen slush in gutters. When ice dams occur, water can be forced under the roofing materials and may cause damage to a home’s ceilings, walls and insulation, and long-term damage to structural components.
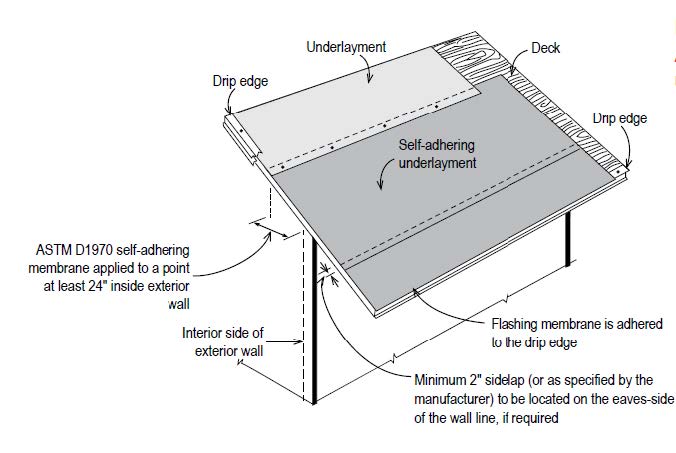
The installation of an ice dam protection layer along eaves is recommended to protect against leakage from ice dams. Per the International Building Code and the International Residential Code (IBC and IRC), in areas where there has been a history of ice forming along the eaves causing a backup of water, an ice barrier shall be installed. The International Residential Code (IRC) refers back to the local authority having jurisdiction. There are two methods of creating an ice dam protection layer. The installation of a polymer modified bitumen self-adhering underlayment that complies with ASTM D1970 (one layer) is one approach, as recognized by the current version of the IRC. It is ARMA’s recommendation that the product should be extended a minimum of 24 inches (610 mm) inside the interior wall line of the building. There are some jurisdictions that will require eave protection to extend further up the roof slope, and other jurisdictions that will call for less. In all cases, apply per the roofing manufacturer’s installation instruction and your local building code.
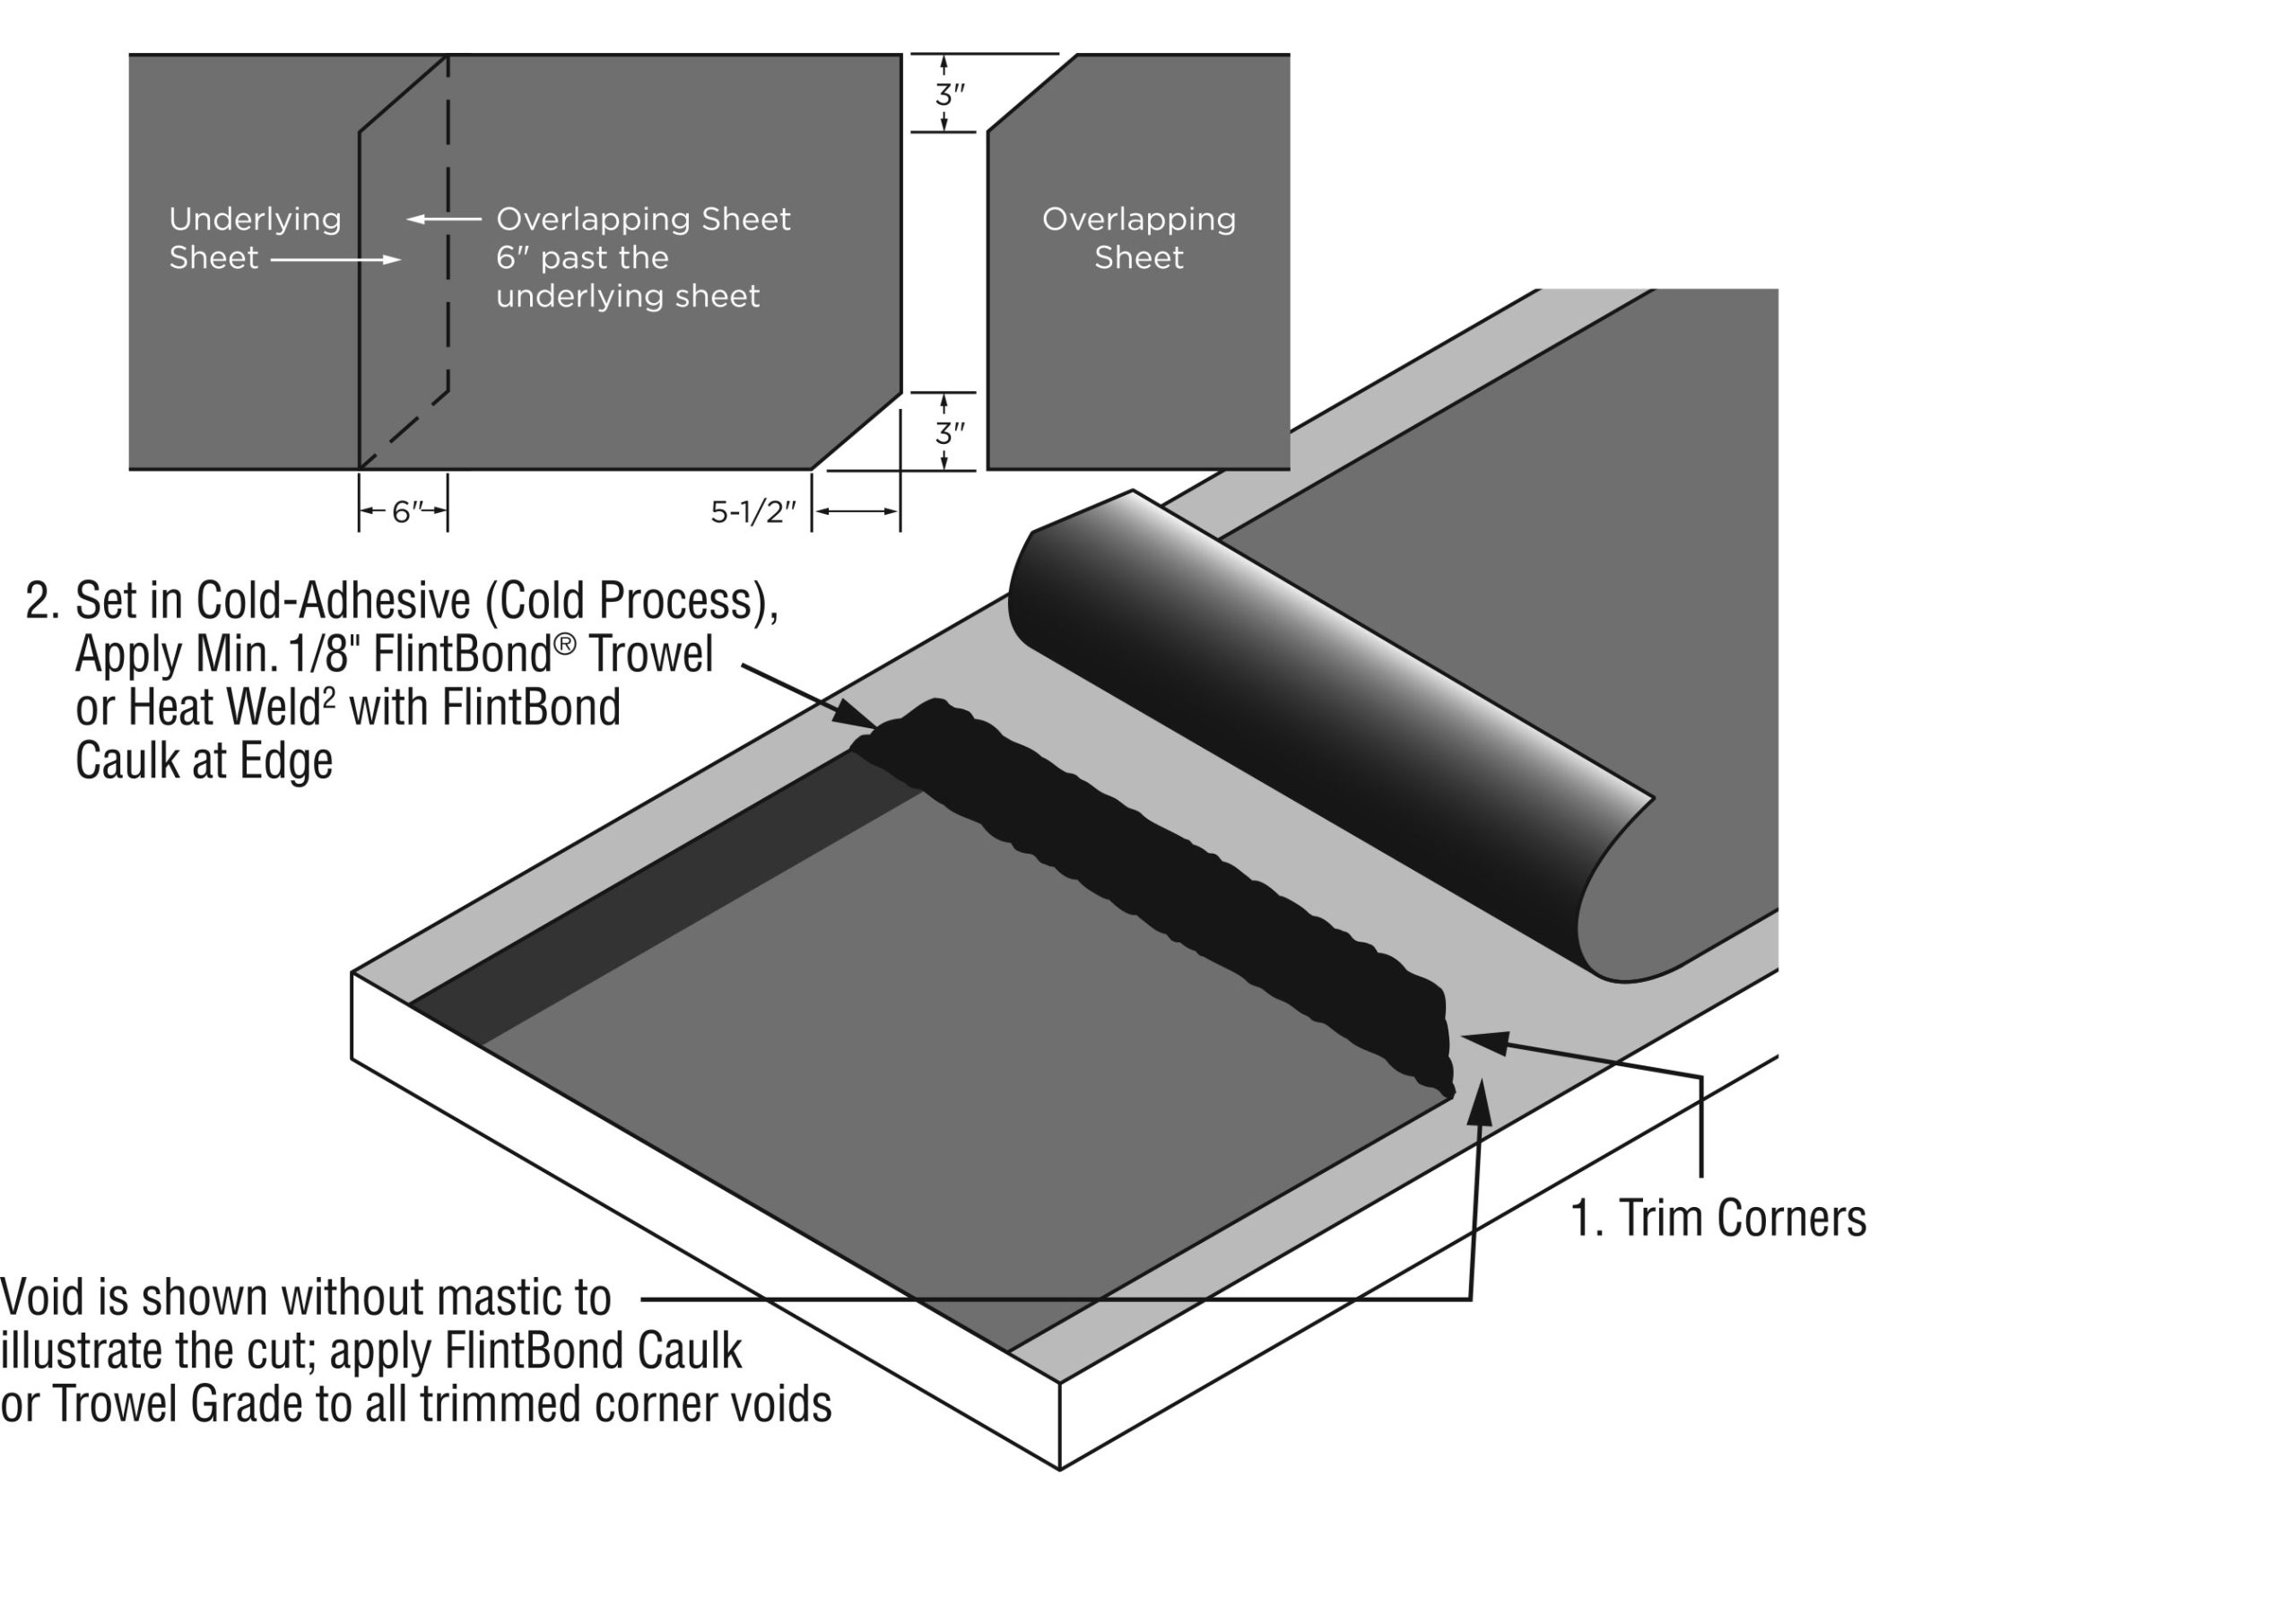
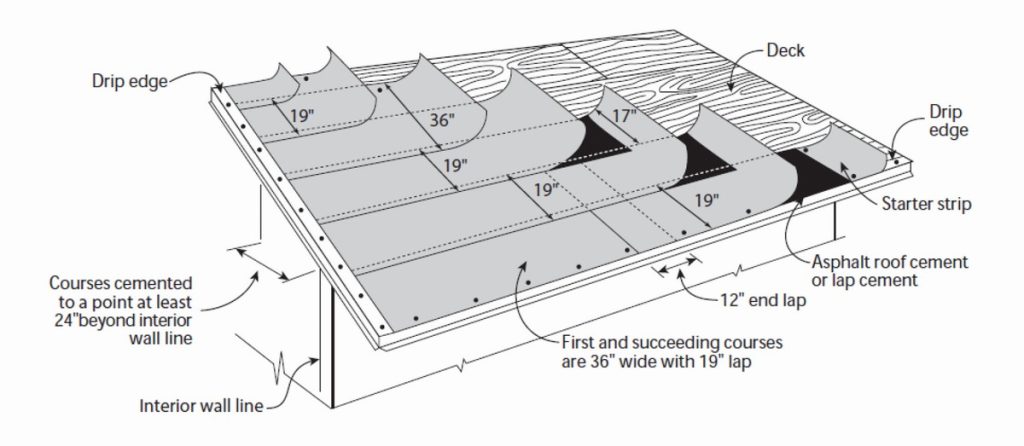
As an alternative, use two layers of asphalt saturated felt as the ice dam protection. Thoroughly adhere the felts to each other with a continuous bed of plastic cement from eaves to a point at least 24 in. inside the interior wall line of the building. Begin by applying the felt in a 19 in. (483 mm) wide strip along the eaves, overhanging the drip edge by ¼ to ¾ in. (7 to 19 mm). Place a full 36 in. (900 mm) wide sheet over the 19 in. (483 mm) wide starter piece, completely overlapping it. All succeeding courses will be positioned to overlap the preceding course by 19 in. Refer to the roofing manufacturer’s installation instruction and the local building code for any additional requirements.
*DISCLAIMER OF LIABILITY: This document was prepared by the Asphalt Roofing Manufacturers Association and is disseminated for informational purposes only. Nothing contained herein is intended to revoke or change the requirements or specifications of the individual roofing material manufacturers or local, state and federal building officials that have jurisdiction in your area. Any question, or inquiry, as to the requirements or specifications of a manufacturer, should be directed to the roofing manufacturer concerned. THE USER IS RESPONSIBLE FOR ASSURING COMPLIANCE WITH ALL APPLICABLE LAWS AND REGULATIONS.
Nothing contained herein shall be interpreted as a warranty by ARMA, either express or implied, including but not limited to the implied warranties of merchantability, fitness for a particular purpose or non-infringement. IN NO EVENT SHALL ARMA BE LIABLE FOR ANY DAMAGES WHATSOEVER, including special, indirect, consequential or incidental damages or damages for loss of profits, revenue, use or data, whether claimed in contract, tort or otherwise. Where exclusion of implied warranties is not allowed, ARMA’s liability shall be limited to the minimum scope and period permitted by law.
This article is from the Winter 2023 Edition
Click above to read the entire issue. Other articles from that edition on our website are linked-to below.
Read an article about ice dams from Air Vent here.
Melting ice dams with heated cables: Click here.


