BY JOE THOMPSON, CERTAINTEED
End laps are susceptible to a capillary condition that can lead to water incursion into the roof structure. That’s why, when it comes time to install an end lap, it’s important that you follow the proper steps to ensure a watertight seal.
For a typical cap sheet, such as a Flintlastic® SA Cap, a 6” minimum overlap securely sealed with our FlintBond® SBS-Modified Adhesive, Caulk, or Trowel Grade is critical. As I like to say, “If you don’t see blue, there is something you have to do.” This means that if you don’t see the top blue facing of either our installed Flintlastic SA NailBase, SA PlyBase, or SA MidPly sheets, you will need to apply our FlintBond SBS Modified Adhesive — Caulk or Trowel Grade — in a uniform bed covering the entire dimension of the end lap.

Follow along below as I detail the steps to successfully prepare and install membrane end laps (Construction Detail CT-22).
Steps to Install Membrane End Laps
For professional installation of end laps with CertainTeed Flintlastic SA Self-Adhered Membranes using Flintlastic SA Cap, FlintBond Trowel, and FlintBond Caulk.
1 Make sure all side and end laps are installed with the slope of the roof to ensure that no laps are installed against the flow of water.
2 Position the new roll to overlap the existing roll a minimum of 6”, creating the end lap. It’s helpful to score and leave release film in place until you are ready to adhere the end lap.
3 Adhere the new roll, up to the end lap.
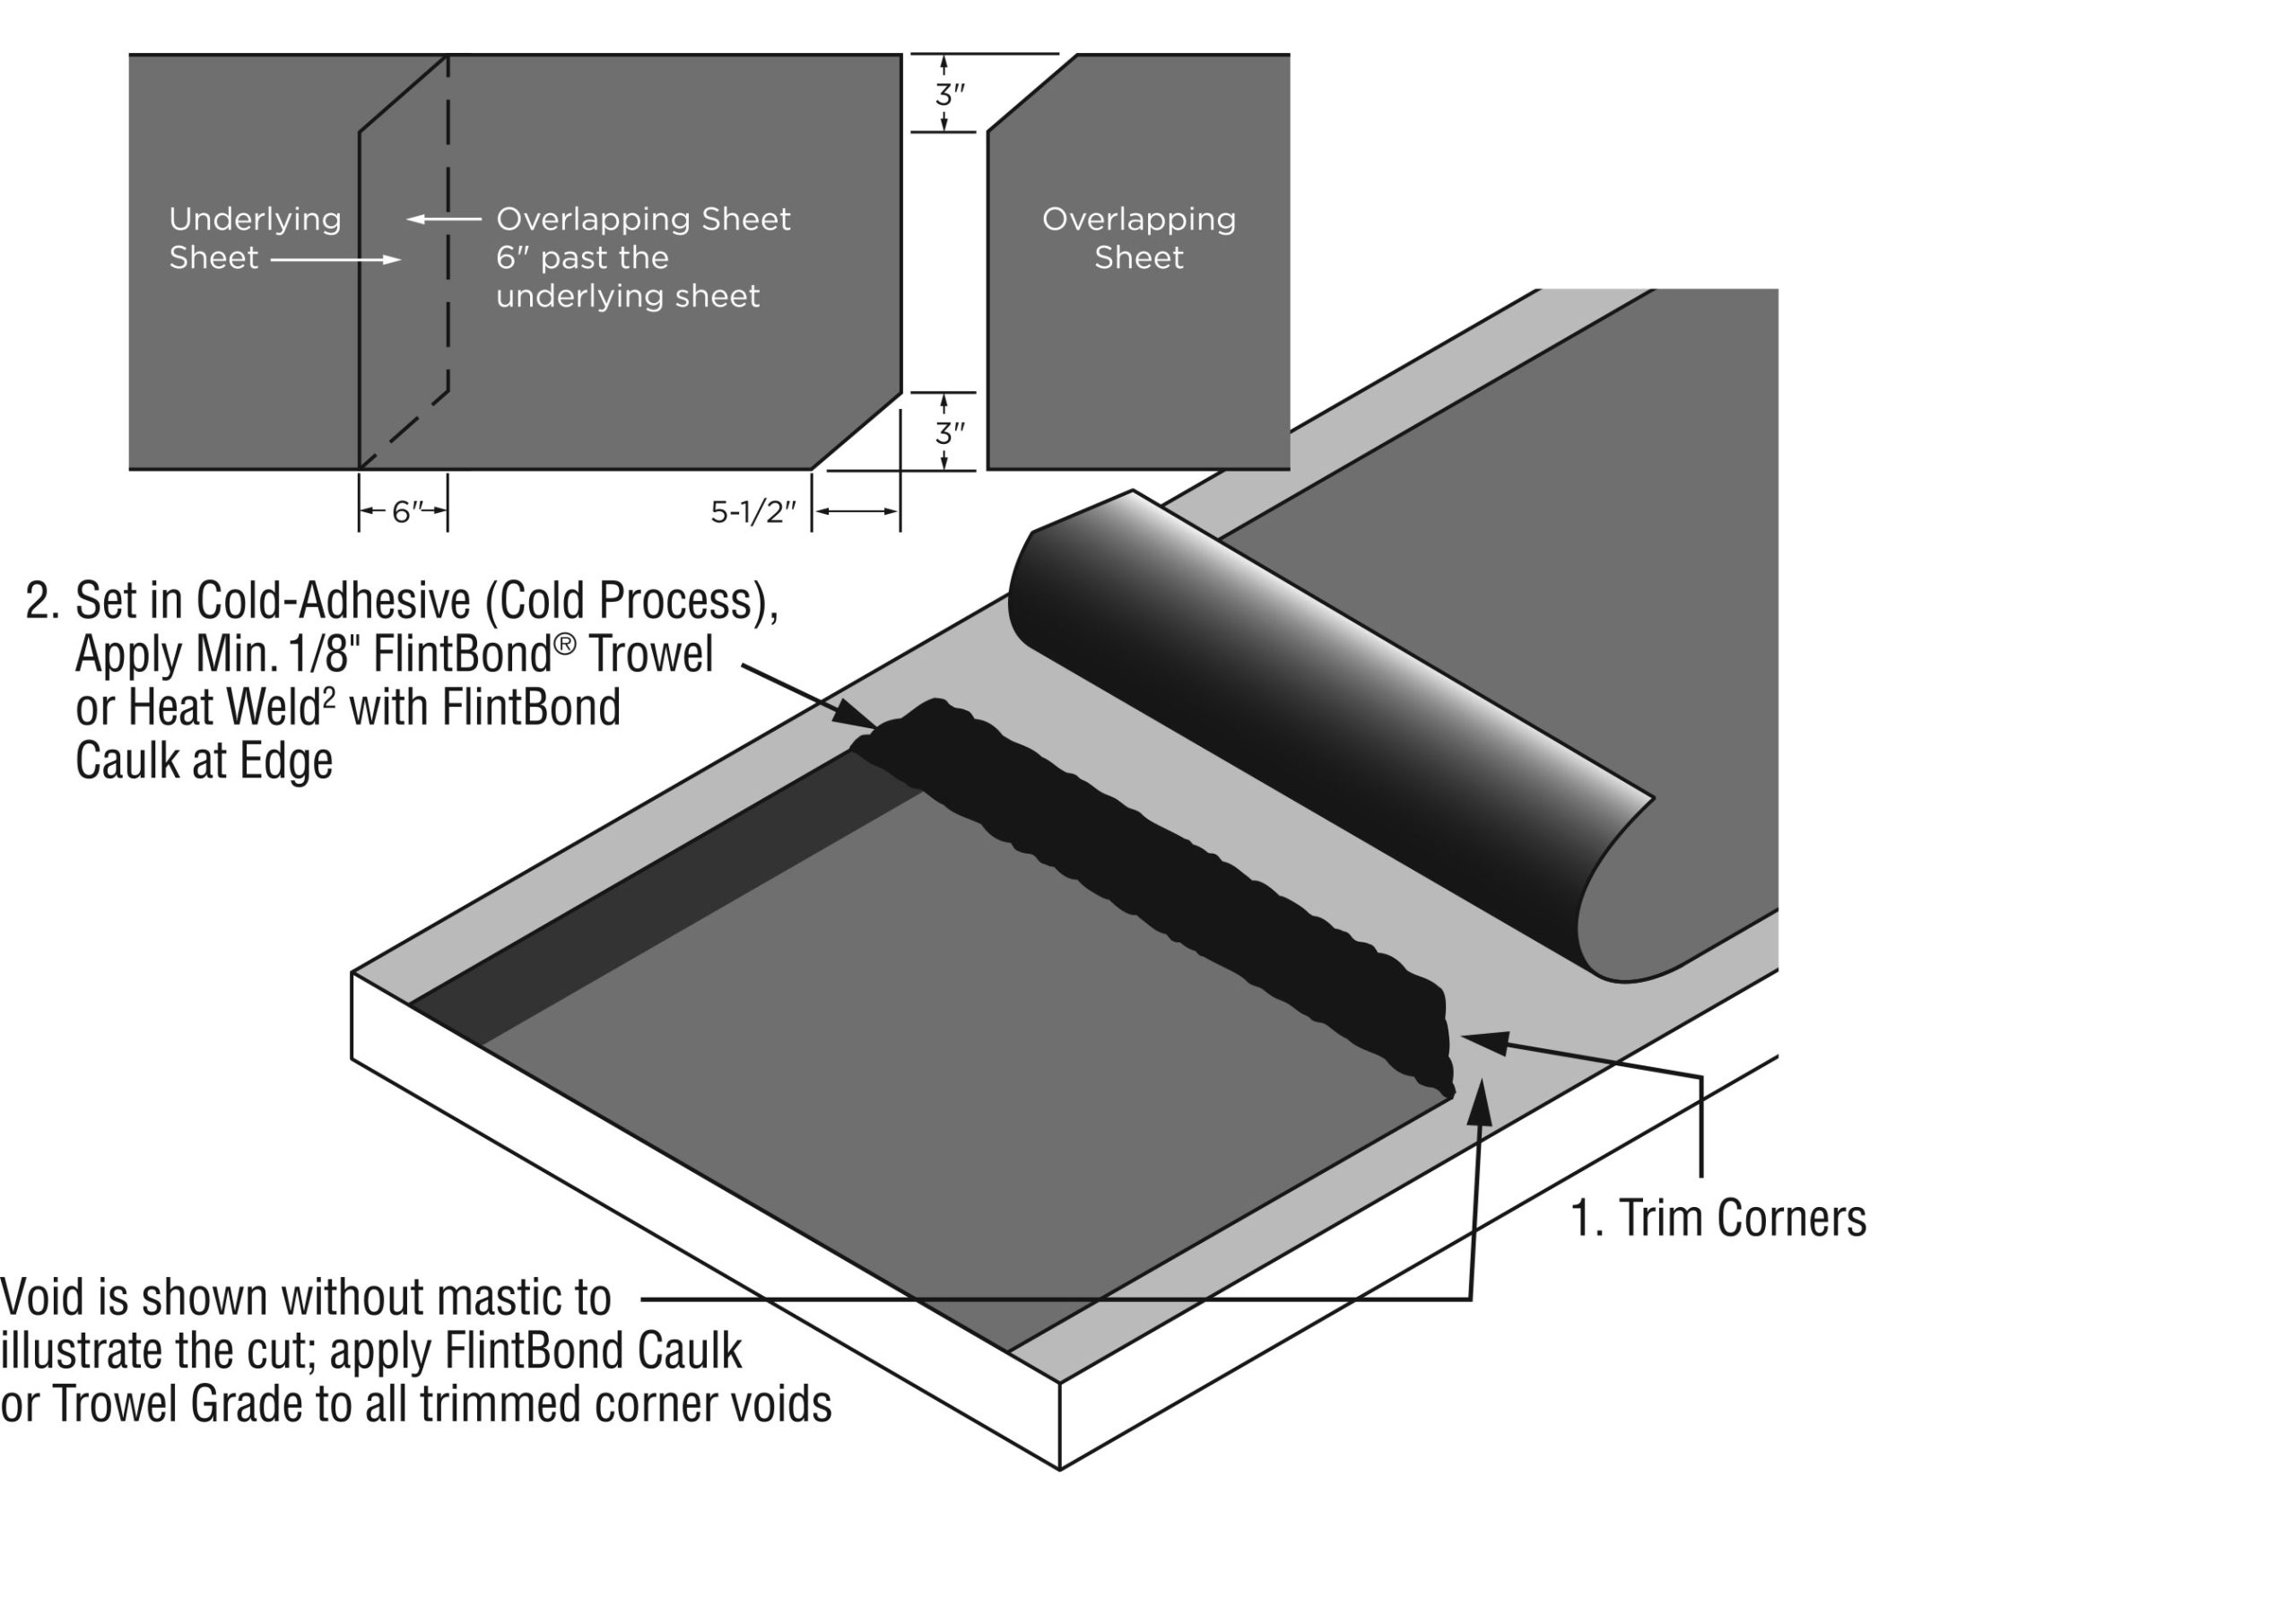
4 If no further action was taken before adhering the end lap, this T-lap would be at risk for water incursion through capillary action. To avoid this scenario, using the selvedge dimension of 3” as your guide, cut the installed sheet on an angle to as close to the 6” dimension as possible. I recommend 5.5” to avoid overcutting. Now, the T-lap is removed, and the intersection will be smooth and watertight.
5 To avoid the T-lap on the next course, make a similar cut on the opposite corner on the sheet being installed.
6 Again using the selvedge dimension of 3” as your guide, cut the top sheet on an angle, 5.5”.
7 Make all T-lap cuts in the same direction, starting about 3” into the roll, cutting out.
8 When the new roll overlaps a granulated surface, as with Flintlastic SA Self-Adhered Membranes, apply FlintBond SBS-Modified Adhesive — Caulk or Trowel Grade — to the entire 6” overlap ensuring a minimum of ¼” FlintBond bleed-out.
9 Though not required for warranty, broadcast CertainTeed FlintRock™ color-matched Roofing Granules into the wet resin if desired for aesthetic reasons.

Watch Joe Thompson demonstrate these and many more step-by-step instructions in his videos at https://bit.ly/CTJoeKnows.