Originally Published as: Flashing a drain With Liquid Flashing
This is part 3 of a 5-part flashing series by CertainTeed’s Joe Thompson.
A well-designed low-slope roof directs water towards drains and gutters to eliminate ponding water conditions. Defending against leaks and moisture seepage is essential for maintaining an effective roof system as well as warranty compliance. Yet all too often, an improperly flashed penetration leads to leaks and damage.

In Part 2 of this 5-part flashing series, I showed you how to flash a drain with CertainTeed Flintlastic® SA Cap, Flintlastic SA MidPly or Flintlastic SA PlyBase, FlintBond® SBS Adhesive and FlintPrime® Aerosol. In this installment, I cover how to flash a drain with SmartFlash® ONE, CertainTeed’s one-part, seamless, durable liquid applied polyurethane bitumen waterproofing resin. Liquid flashing offers advantages when flashing penetrations due to its elasticity, ease of install, and efficiency. It can conform to irregular penetration shapes, requires no priming or component mixing, and unused resin can be stored and used on a future project.
Follow these steps to ensure that your liquid-applied drain flashing is effective and can last for years to come.
Steps to Flash a Drain
Using CertainTeed SmartFlash ONE, CertainTeed Flintlastic SA Cap, and CertainTeed Flintlastic SA PlyBase.
- With any drain detail, you want to make sure you have positive slope from the field down into the drain. Our FlintBoard® Hinged Target Sump offers a quick, material-efficient way to achieve a positive slope.
- Position your base sheet and roll out over the drain. Allow the bolts to penetrate through the membrane before cutting out the drain access.
- Do the same for the cap sheet. Your base and cap sheets should be positioned to avoid sidelaps or endlaps running across the drain.
- With the membrane in place, cut flush with the edge of the drain bowl. You’re now ready to flash in.
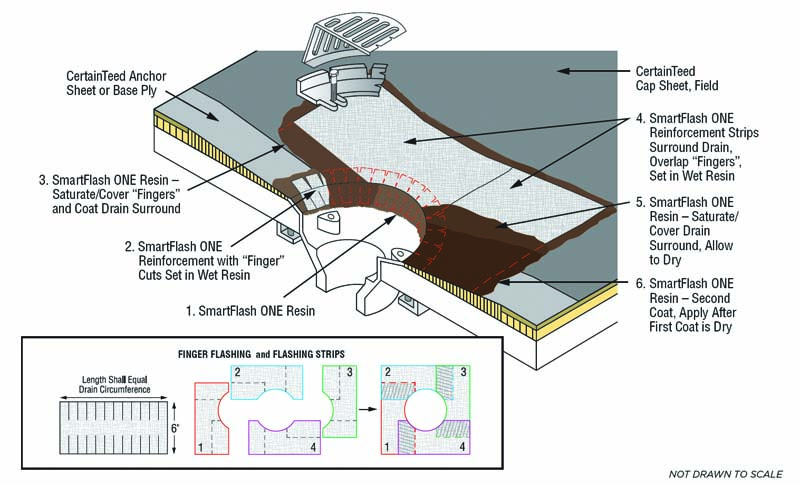
- Start by preparing the SMARTFAB 500 Polyester Reinforcement. First, determine the length of the fabric, assuming a 2” overlap within the drain.
- Once you have that length cut, cut fingers into the top and bottom of the polyester.
- Prepare the target patch which will sit on top of the fingers. We have a schematic for achieving the target patch with 6” strips in the SmartFlash ONE brochure.
- Take the 6” strips, each measuring a minimum 12” in length, and cut out the fabric to accommodate the bowl. Overlap the pieces as necessary to square the edge.
- Tape off the edges for a clean aesthetic, though it’s not necessary for waterproofing. Now we’re ready for resin.
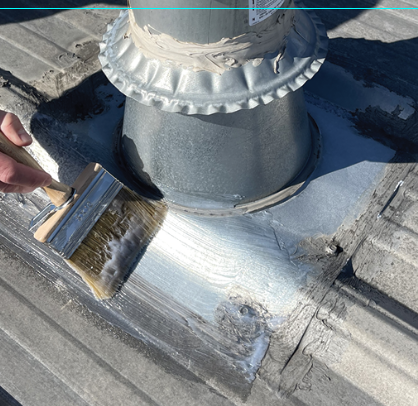
- SmartFlash ONE is thick and can be applied easily with a brush or roller without dripping. First, apply the resin around the drain and 4” into the drain bowl at approximately 30 wet mils thick.
- Lightly press in your finger flashings.
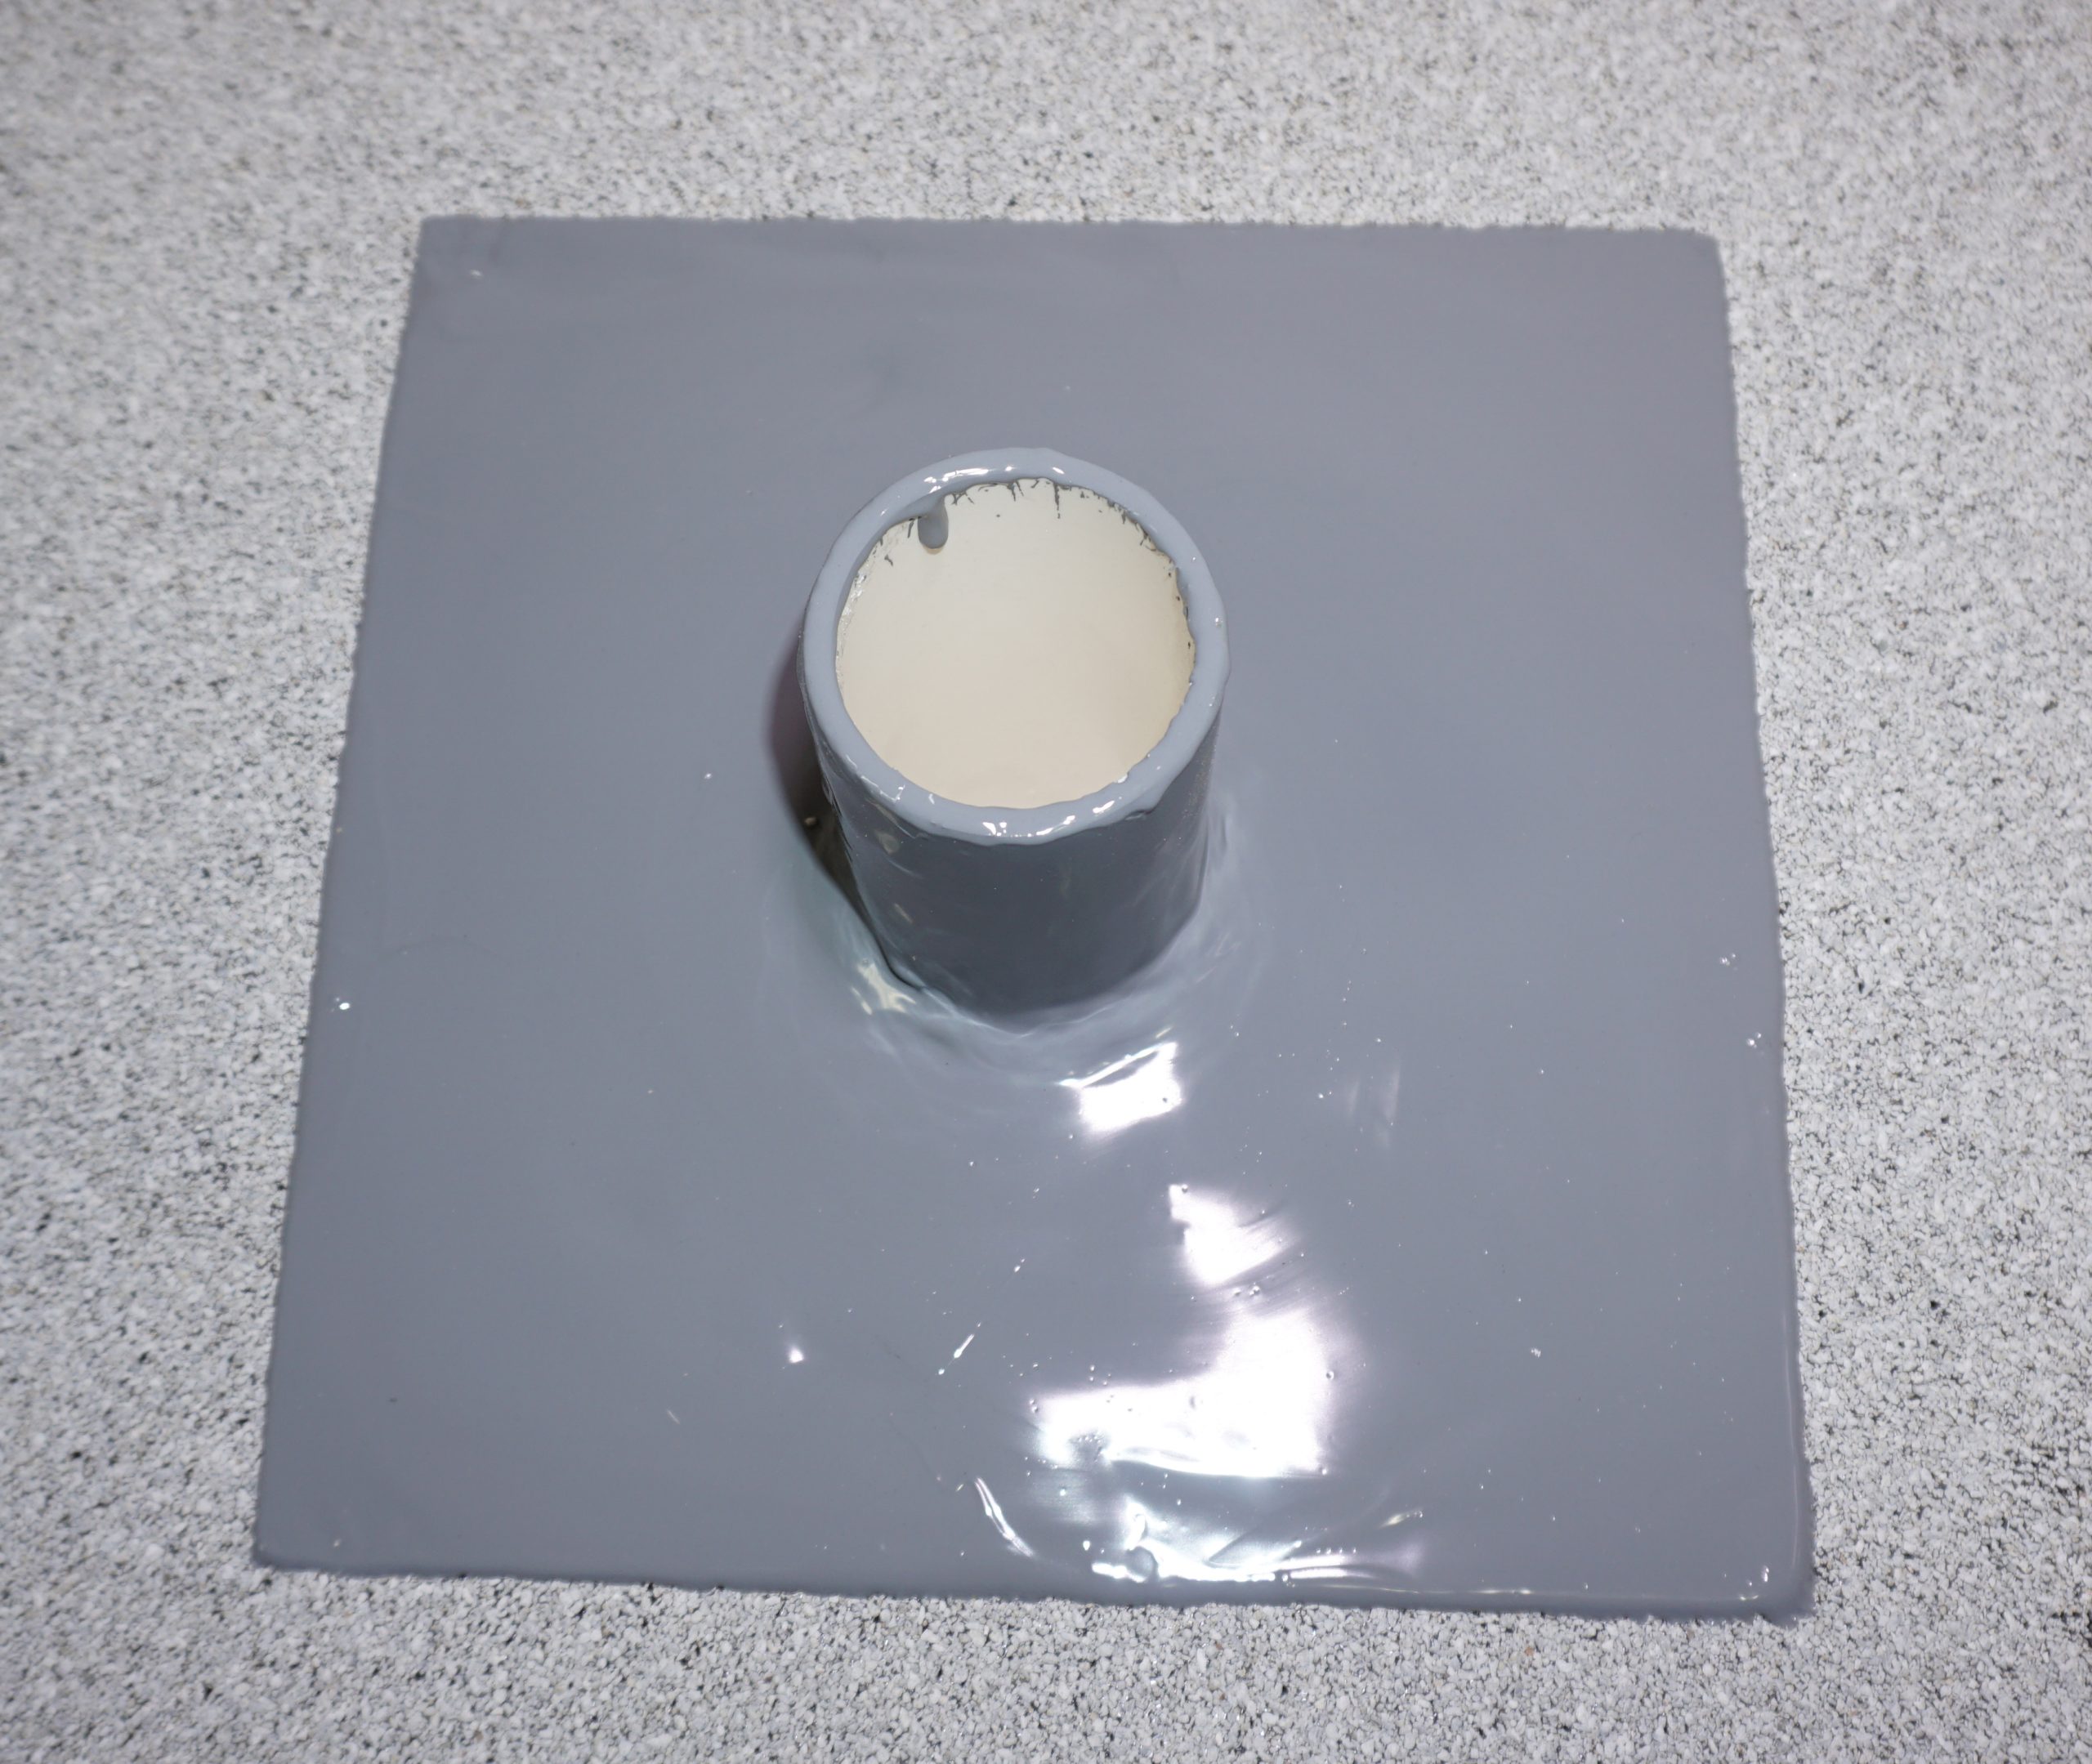
- Fully cover the fabric with resin, making sure to put resin in the 2” overlap. You should not see any fabric.
- Press in your target patches. Again, fully coating the surface and overlapped areas with resin approximately 30 wet mils thick.
- While not required for warranty coverage, color-matched FlintRock Granules can be broadcast into the top coat for a more aesthetically pleasing look..
- Once you’ve fully waterproofed the drain bowl, install the clamping ring.